
I figured out the whole Sims 1 modding fiasco! (13/08/2024)
NOTE:This article is a direct continuation of the previous one about attempting to mod The Sims 1, so go read it for context.
Hello again!
You may remember that I was trying to, and failing miserably, mod The Sims 1, by adding a cool little Friday the 13th Part VIII poster to the game.
What actually ended up happening was that I couldn't figure out how to modify the object's behaviour to change its room rating value, and once I imported it into the game, the
actual sprite was horribly misplaced.
It was very late at night and I couldn't figure out what was going on, but it turned out to actually be rather easy...
It was as simple as using the same process that I used for the alpha channel sprite, for the Z Buffer sprite (replacing the color table, replacing the old color references with the new ones...).
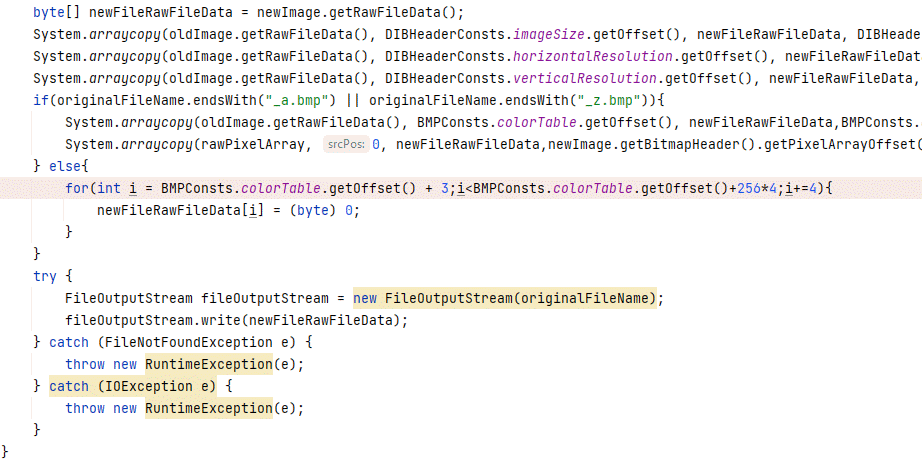
I modified my Java program to do this, and I also took the opportunity to tweak it to translate other inconsistent data from the Transmogrifier BMP's to my BMP's:
And if we now import the object into the Transmogrifier...
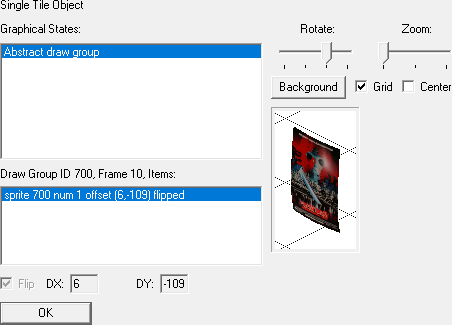
IT WORKS!!!! YES!!!!
Alright, but now we still have another problem to fix, of course! The room rating value! Let's try this again...
I believe I'm actually starting to understand what this all means.
See, the first thing the code does is assign my room rating to my current value, which is... well, the object's actual monetary value!
Okay, this is just my assumption, but I think it actually makes sense, because this is one of those objects whose decorative value is actually based on how much it costs, because its value
deprecates over time..
Basically, the longer you own this thing, the less you can sell it for AND the less it will improve your room rating.
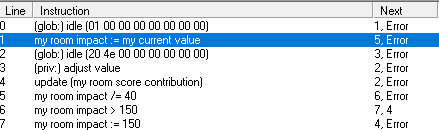
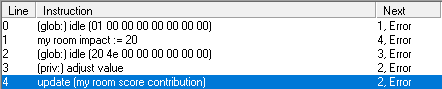
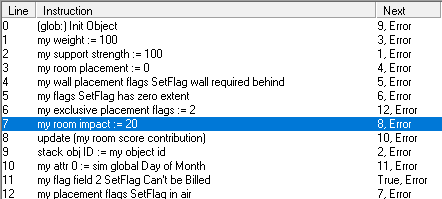
So, if we take in mind the original object's buy mode value, which was 2140§, things will start making more sense. This is how the code goes:
- Idle for a value of 1.
- Set the object's room impact value to its current sell value, which starts at 2140§, so that will be the starting number.
- Divide the room rating value by 40, so it becomes 535.
- Is the room rating greater than 150? In this case, it is, then...
- Set the room rating value to 150. Essentially, this means that the room rating can't be higher than 150, but it can be lower.
- Update the room score contribution, so now is when the object's room score will actually take effect.
- Idle for a value of 20000. I'm not yet sure what this does, but it probably waits for about a day, which I believe is when the object's value deprecates.
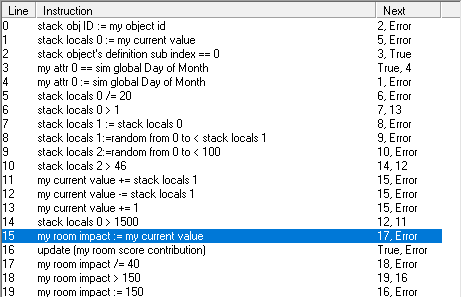
- Once done idling, go into the adjust value private function.
- Set the stack's object ID to the object's ID.
- Set the object's definition sub index to the 0. I actually have no clue what this does.
- Divide the first local variable of the stack by 20. I believe this value is currently 0, so it should stay that way for now.
- Check if the first local variable of the stack is greater than one. In this case, it isn't, then...
- Add 1 to the object's current sell value, which should now be 536.
- As earlier, set the room impact value to the object's current sell value., so, again, 536.
- Divide the room impact value by 40. So it should now be around 13.
- Check if it's greater than 150. In this case, it isn't, then...
- Update the room score contribution. And this is where the whole thing would seemingly end.
Now, I'm not 100% sure I've understood everything correctly, but the main thing to take away here is that the object's room score depends on its sell value,
which deprecates on a daily basis.
Now, this more or less makes sense for the original object, a painting, but for my poster? Not so much.
Its room value shouldn't really decrease over time, nor should it be based on its sell value. It should be somewhere around 20, I think, as I changed the object's
data to show a room value of 2 in the catalogue.
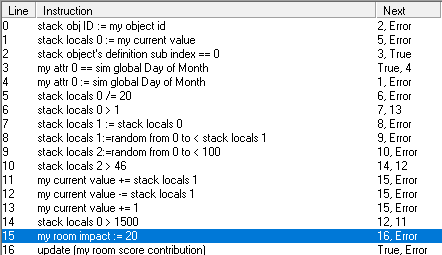
Let's edit the main function first.
The first line we're interested on, is the one where the room impact value is set to the object's sell value. We don't want that, we want to set it directly to 20.
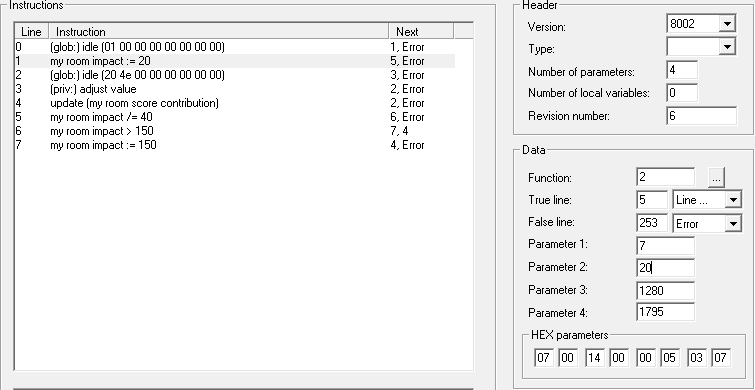
What have I exactly changed here?
Well, I had to modify the last parameter, whose value is usually 03 to 07.
While I couldn't exactly tell you what this is supposed to be, it seems to be some sort of mode switcher for the third parameter of the function. When it's set to 03, its value will always
be referencing some sort of object or variable (like my current value as it originally did), while when it's set to 07, it's simply a number, which in this case, we've set to 20.
Now, because we simply want to set the room rating value directly to 20, we don't need to do any division or compare it to 150 or anything, so we can directly jump to line 4 to update the room
contribution value, which then jumps to the next function that we have to modify.
This is how the main function ends up looking:
Now, the adjustvalue function does a lot more stuff, but really, we're only interested in what are essentially the same lines of code as in the previous functions, as they work the same way as the ones in the main functions did:
I will simply change it so it does the same thing as the previous function, that is, the room rating value will be set to 20, the room contribution value will be updated, and the function will then simply return!
Now, there's actually one more function we have to modify, the init common function.
I'm not particularly sure when this one is used, but most likely, it is executed when we first place or buy the object, or something like that.
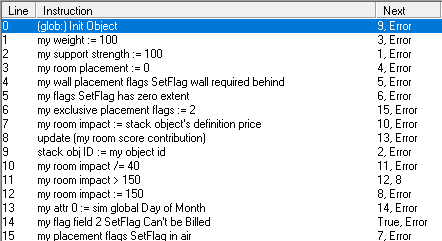
Same idea here, really. We will simply set the room rating value directly to 20, and then update the room contribution score.
Let's now cross our fingers and test the object in the game.
Here goes nothing...
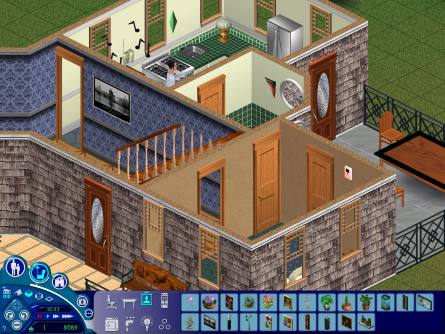
And it... it...
Oh, come on are you FUCKING kidding me?! The fucking Z buffer for half the image is too damn low?!
Yeah... that seems to be the issue. The colors in the Z buffer sprite are set in a way that the game thinks the poster is supposed to be behind the wall, or at least, half of it is.
Well, how was I supposed to know?
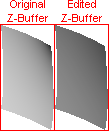
Oh well, I tried the simplest solution I could think of, and that was to simply edit the brightness levels of the Z buffer sprites in Paint.net.
I used these values to get something similar to what the original painting sprite had:
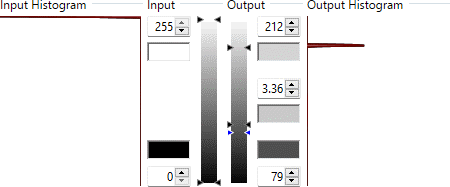
This was the difference. It's not super noticeable, but I guess it makes a huge difference in the game. I wish I had a way to see what the wall's Z-Buffer sprite is.
Now let's see how it looks in the... FOR FUCK'S SAKE!!!!!!!! IT'S THE FUCKING SAME!!!!!! JUST FUCKING WORK ALREADY

Alright, time to go back to the drawing board.
Or rather, back to Blender. Well, I was reading through some tutorials,
and I basically had an epiphany!
I realized an important detail, when rendering an image, the Z-Buffer is really relative to what's actually in the image. So, why didn't I just put a wall behind the poster in the render?
Let's see how it looks.

That looks promising!
But of course, I don't actually want the wall to be visible in the final render. No worries tho, Blender just happens to have a rather quick option for that, right here:
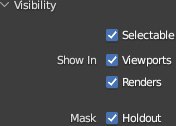
It's the holdout option in the visibility panel of the object, in this case, the wall.
Basically, it won't render the actual object in the final image, but its properties will still apply, so it works perfectly for our case.
Now I just need to... oh...
Well, that does make sense, once the camera is right behind the wall, it will obscure the poster.
Thankfully, the solution was rather simple, I simply moved the wall to the other side of the poster on frame 30 onwards, and now, we have some proper results...

I believe we're finally ready to test it in the game. This better work, because quite honestly, I'm ready to go and locate Will Wright and kick him in the balls for making me suffer this much.
Here goes nothing...
And of course, it didn't fucking work.
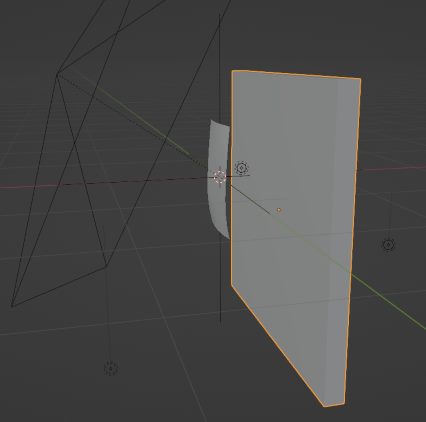
Well, I spent some time toying around with the render. I moved the wall back and forth, trying to find the perfect position and... I GOT IT. YES.
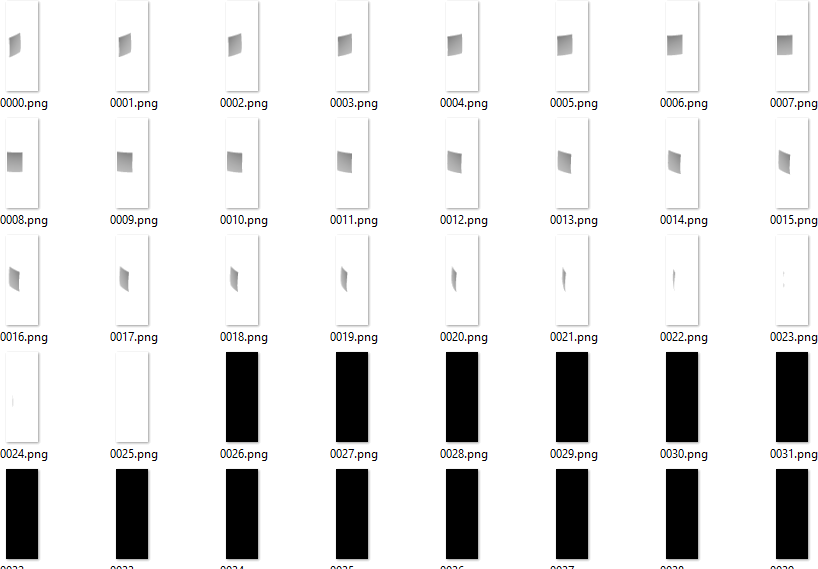
This is how I ended setting up the wall:
After rendering and setting the bitmaps up, this is how they ended up looking. The gray levels don't really match that of the original object, but it does seem to work.

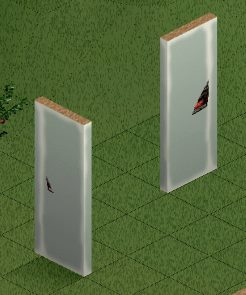
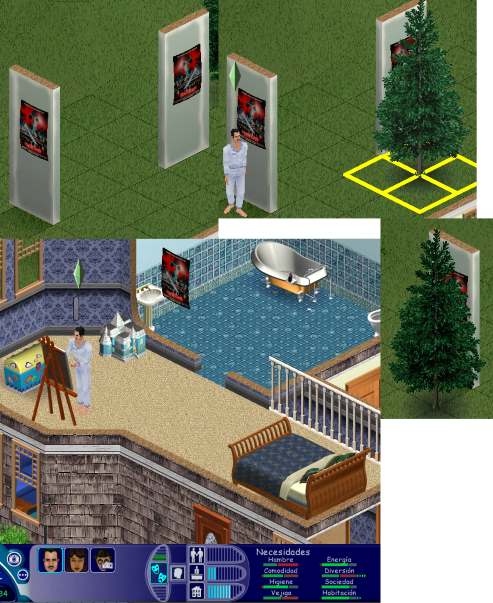
And in-game? It... actually works!
The depth of the object seems to work fine, Sims don't like the poster itself too much, as I did in fact set it up, and it does increase the room rating, but only a little bit.
So... it works... perfectly! Or, well, almost perfectly, because the sprite simply mirrors itself when rotated to the side.
Oh well, I'll fix that... eventually. Cause right now, I'm really damn tired, so this will be it for today.
I hope you had fun reading this whole thing, you can download the mod if you want right here!
¡Más tarde!

This page is currently under construction!
Please, be patient!
